Upgrading My Unibody MacBook's RAM
Wednesday, July 8, 2009
by Charles W. Moore
I finally got around to upgrading the RAM in my 13-inch MacBook last week. My original plan had been to move on this fairly quickly, but the little critter worked so well with its stock 2 GB of RAM, I didn’t have a whole lot of incentive to not procrastinate.
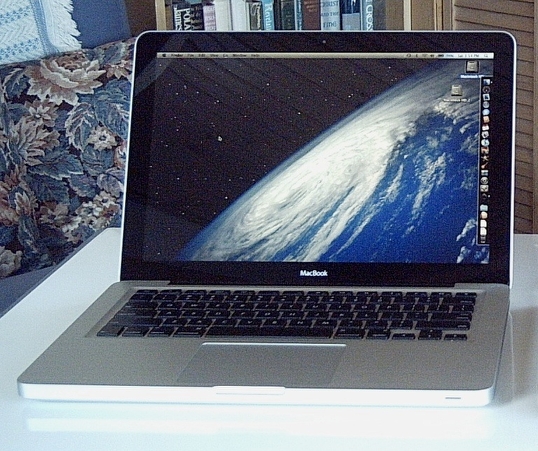
However, I figured if I was ever going to, I might as well be enjoying whatever advantages more RAM would provide, so a couple of weeks ago I got around to ordering a 4 GB RAM upgrade from Other World Computing. I had checked out prices from a couple of Canadian online RAM suppliers, but even factoring in the exchange rate and shipping costs, it pretty well worked out to a wash or even slightly lower cost in going with OWC, and since I’ve had excellent service and performance from various OWC hardware upgrades, including RAM, in the past, that seemed to be the sensible alternative.
The 4 GB RAM upgrade from OWC listed at US $64.99, which doesn’t seem bad at all considering that I paid well over $100 for a 512 MB upgrade for my then-new G3 iBook back in 2003 (from Amazon).
It took a little over a week for the upgrade to arrive via the U.S. Postal Service and Canada Post, which was the cheapest shipping option. After waiting nearly 5 months, that wasn’t too onerous a lag.
One of the things about this upgrade that does rub me the wrong way is that it’s necessary to remove 2 GB of perfectly good RAM from the MacBook’s two RAM slots in order to install the two 2GB modules of the 4 GB upgrade. OWC does offer a nominal trade-in allowance for your old RAM, but the complexities and cost of cross-border shipping made that seem hardly worthwhile for me. One of the rationales is to have paired RAM, which reportedly does offer a slight advantage in speed and efficiency, although the MacBook will also support running with 3 GB of memory using either a 3 GB or a 1 GB and 2 GB module combo. The maximum RAM configuration supported by this machine is 6 GB in the form of two 3 GB sticks, but that gets pretty expensive, and given my level of satisfaction running with just 2 GB, I figured 4 GB would be ample for my purposes for the foreseeable future. Incidentally, the new 13 inch MacBook Pro can support up to 8 GB of RAM.
The Other World Computing RAM came with the two modules in separate plastic packages along with an installation instruction sheet featuring excellent color photography.
The first installation step is to shut down the computer and place it on a comfortable work surface, preferably padded so as not to risk scratching the MacBook’s anodized finish.
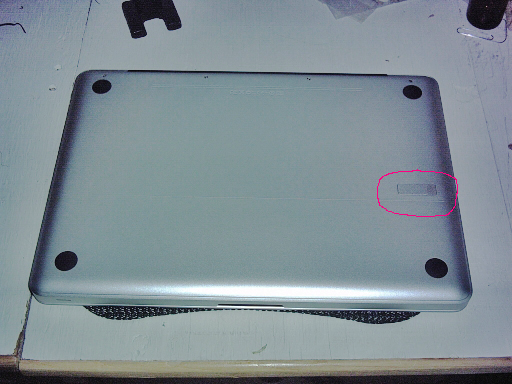
Press the battery bay cover release latch which is located close to the right-hand side on a MacBook (circled in the photo — it’s on the left-hand side on the MacBook Pro but otherwise functionally identical) to unfasten the battery bay cover which can then be lifted clear. There are silkscreened instructions for memory and hard drive installation on the inside of the battery bay cover, although they are pretty vague and sketchy.
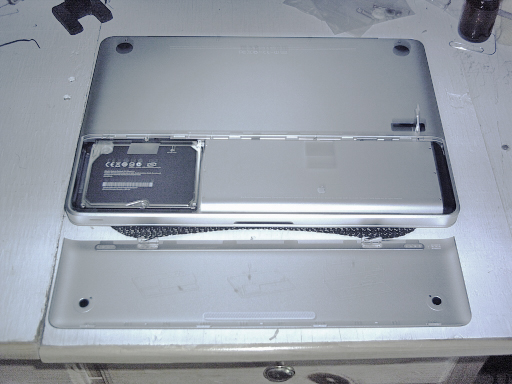
This delightful little machine just blows me away with the fit and precision machining of its aluminum case and associated bits, and opening it up reinforces the impression. If one ever has misgivings about ponying up the so-called “Apple tax” price premium one pays to own a Mac laptop, pondering the design sophistication and build quality of these unibody MacBook Pros should help justify the extra cost over whatever you’d pay for a typical PC lower-priced laptop.
I digress. The next step in our RAM install is to lift the clear plastic pull tab attached to the battery module and lift it from me computer housing to set aside.
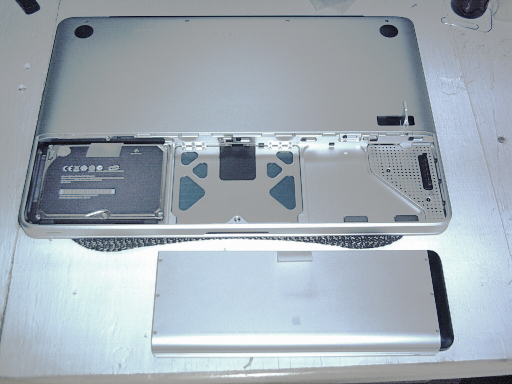
Now it’s time to get out your probably smallest-sized Phillips screwdriver and remove the eight screws that secure the MacBook’s stamped aluminum bottom cover to its unibody chassis. I found that the smallest Philips in the $19.99 NewerTech 11-Piece Portable Toolkit (NewerTech is a division of Other World Computing), to be well-suited to the job.
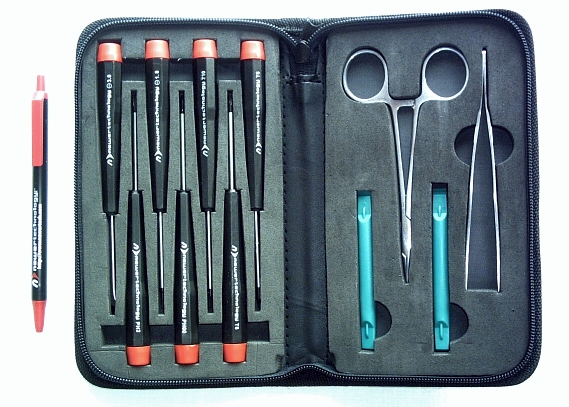
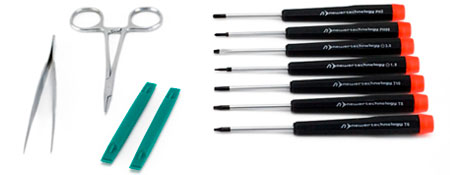
The screwdriver tips are also magnetized, which can be extremely handy if you have to maneuver a fastener into a cramped, hard-to-reach spot, or retrieve one that’s been dropped in an difficult-to-access place. Magnetic tips are also helpful when dealing with extremely tiny screws even in easy access spots like the bottom of my MacBook. I suggest having a small tray handy in which to park the screws while you’re working, minimizing the possibility of losing any.
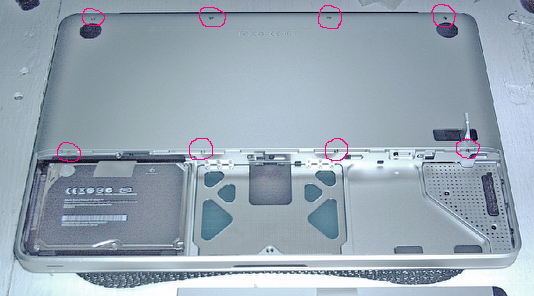
The screws, shown circled in red in the accompanying photo, are best removed working from left to right according to OWC’s instructions. The row closest to the battery bay and the leftmost one of the row along the outer edge are all really short little guys, while the remaining three from the peripheral row are longer. Shouldn’t be too difficult to remember when putting things back together.
Once the screws are removed you can pop the bottom cover off. I found that it took a bit of prying force to disengage the cover, but not terribly much. The important thing to remember is to avoid distorting these very thin aluminum cover stampings by applying excessive force.
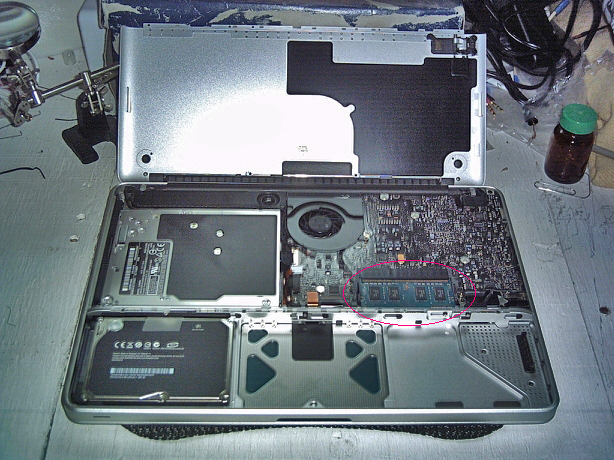
With the bottom cover off, the MacBook’s logic board and optical drive are exposed along with a surprisingly large cooling fan, which happily I’ve only heard kick in briefly a couple or three times in five months. The RAM slots are adjacent to the battery bay (also circled in red), and piggybacked one on top of the other, so the two RAM modules have to be removed sequentially. Just gently pry the plastic retaining clips outward with your thumbnails and the top RAM module will spring up to a 30° angle, at which point it is very easy to pull it out of its slot.
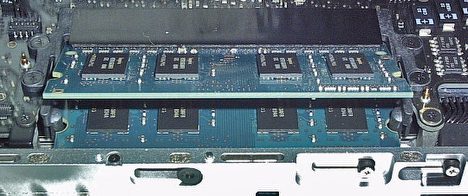
Installation is the simple reverse of the above-described procedure. Insert the RAM modules into their respective slots at a 30 degree angle and gently press down until the retaining clips click home. It’s a good idea to visually confirm that the small tabs that hold the module in place are properly engaged and seated on both sides of each RAM module.
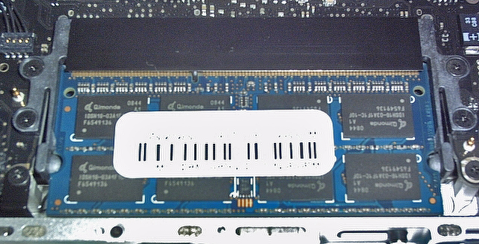
Now all that’s left to do is to button things up, in reverse order to how you took them apart. Insert the three long bottom cover screws first, followed by the five short ones and tighten them all firmly but keeping in mind that you’re dealing with very tiny threads so don’t overdo it.
Reinstall the battery, press the battery bay cover into place, and flip the battery cover latch closed. Thus endeth the RAM upgrade installation phase. It’s not terribly challenging, although definitely not as slick and easy an upgrade as it was with the old iBook or my 17 inch PowerBook, and installing a two-stick RAM upgrade in even a G3 Series PowerBook, which involves removal of the processor daughtercard, is easier and quicker, requiring removal and replacement of only four screws.
The final step is to boot up the computer and check to make sure it’s recognizing the RAM upgrade with “About This Mac” from the Apple Menu.
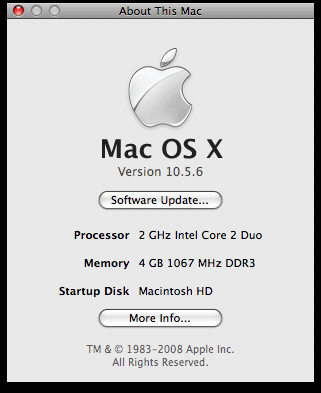
So, have I noticed any dramatic improvement in performance? Not really, but Finder response is perhaps a bit livelier, and big applications like Photoshop Elements seem to start up somewhat quicker, and I expect it will take considerably longer for the memory heap to get fragmented and swap file accessing to slow things down when running many applications simultaneously over long periods without rebooting. The MacBook certainly seems gratifyingly lively while I’m dictating this column using MacSpeech Dictate, with the transcription copying in near real time.
Note: Letters to PowerBook Mystique Mailbag may or may not be published at the editor's discretion. Correspondents' email addresses will NOT be published unless the correspondent specifically requests publication. Letters may be edited for length and/or context.
Opinions expressed in postings to PowerBook Mystique MailBag are owned by the respective correspondents and not necessarily shared or endorsed by the Editor and/or PowerBook Central management.
If you would prefer that your message not appear in PowerBook Mystique Mailbag, we would still like to hear from you. Just clearly mark your message "NOT FOR PUBLICATION," and it will not be published.
CM